How to train YOLOv2 to detect custom objects
In this article, we will be going over all the steps required to install and train Joseph Redmon's YOLOv2 state of the art real-time object detection system. Its technological prowess is explained in detail in the paper YOLO9000: Better, Faster, Stronger and on the project website.
YOLOv2 is written for a Linux platform, but in this post we'll be looking at the Windows port by AlexeyAB, which can be found on this Darknet GitHub repository. All commands and steps described here can easily be reproduced on a Linux machine. While it is true AlexeyAB's GitHub page has a lot of documentation, I figured it would be worthwile to document a specific case study on how to train YOLOv2 to detect a custom object, and what tools I use to set up the entire environment.
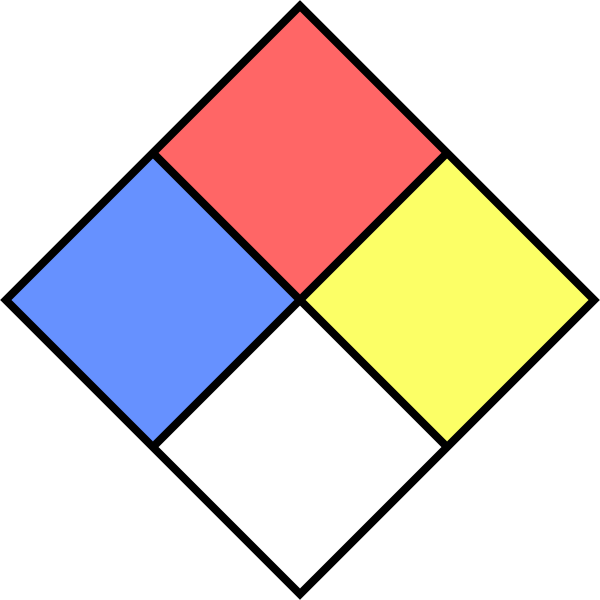
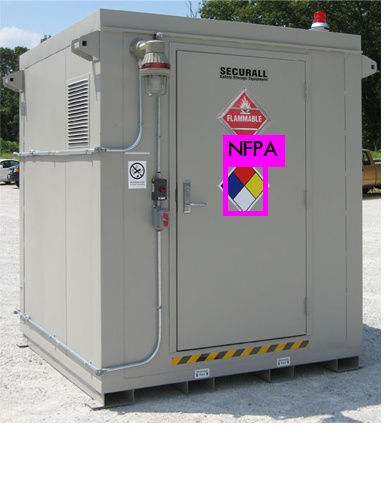
The custom object we want to detect in this article is the NFPA 704 'fire diamond'.
The data set I composed for this article can be found here (19.4Mb).
To be able to follow all steps in this article, you'll need to have some software packages installed on your machine. I won't redo AlexeyAB's documentation, he lists the requirements very clearly.
Getting Darknet
Maybe an obvious step, but included for completeness sake. Clone the Darknet GitHub repository for the platform of your choosing. As I explained, I will mainly focus on a Windows based approach, so open up a Git bash and clone AlexeyAB's repository:
git clone https://github.com/AlexeyAB/darknet.git
Data annotation
We are training a computer vision algorithm, so naturally we'll need images that it can train on. Generally, about 300 different images per category are required to be able to train for a decent detection. These (19.4Mb) are the images I used, if you want to train for your own object you will have to compose your own training set.
I use the BBox Label Tool to annotate the training images. This Python 2.7 library allows us to easily generate the training data in the correct format YOLOv2 requires. So clone the GitHub repository and edit the main.py file to correctly reflect the folder where you have saved your training images. Line 128 is the one requiring our attention:
128            s = r'D:\workspace\python\labelGUI'
129  ##        if not os.path.isdir(s):
130  ##            tkMessageBox.showerror("Error!", message = "The specified dir doesn't exist!")
131  ##            return
It doesn't really matter where you save your training images, just try to keep things organized because we'll have a lot of data all over the place soon.
Next, let's fire up the tool. Seeing as how I have both Python 3.6.0 and Python 2.7.13 installed on my machine, I have to specify we will be using using Python 2.7 in my terminal:
python27 .\main.py
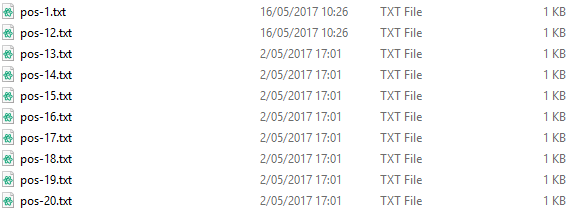
The GUI of the BBox Label Tool will pop up, initially empty. Once we press the Load button, all images we have in our training data folder should be be loaded into the program, provided the script points to the correct folder. This is the first time you will probably notice we are not living in a perfect world: possibly a lot of images are missing. Spoiler: the BBox Label Tool only looks for .jpg images, and no: not even .jpeg files will do. All of your .png, .gif, ... you name it files won't be there. Disaster!
Bulk Image Converter to the rescue! Just launch it from anywhere, pick the folder where your images are at and convert whatever extensions you may have to jpeg. It does say jpeg, but they will be saved as .jpg.
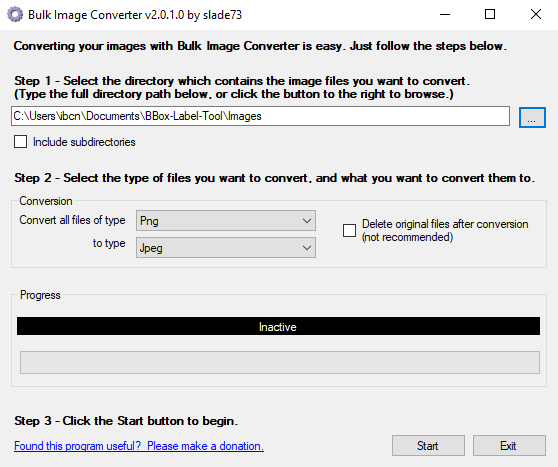
Since this is a Windows only tool, Linux users will have to find a different solution. A quick look around resulted in this solution, based on Imagemagick. I haven't tested this out myself though.
mogrify -format jpg *.png
Crisis averted! All of our images are ready for annotation. Relaunch the BBox Label Tool and check to see if all your training images have been correctly loaded. 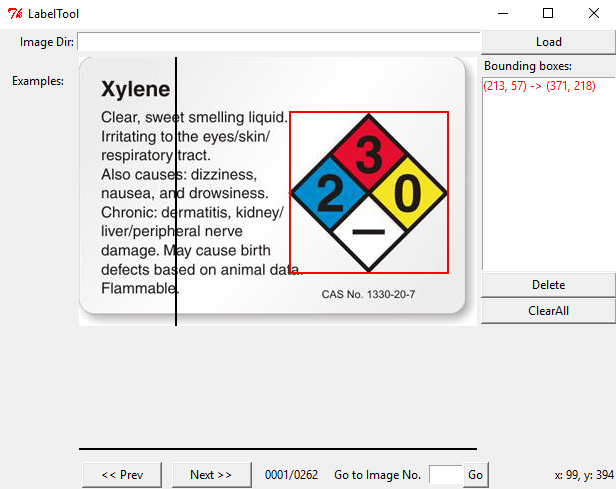
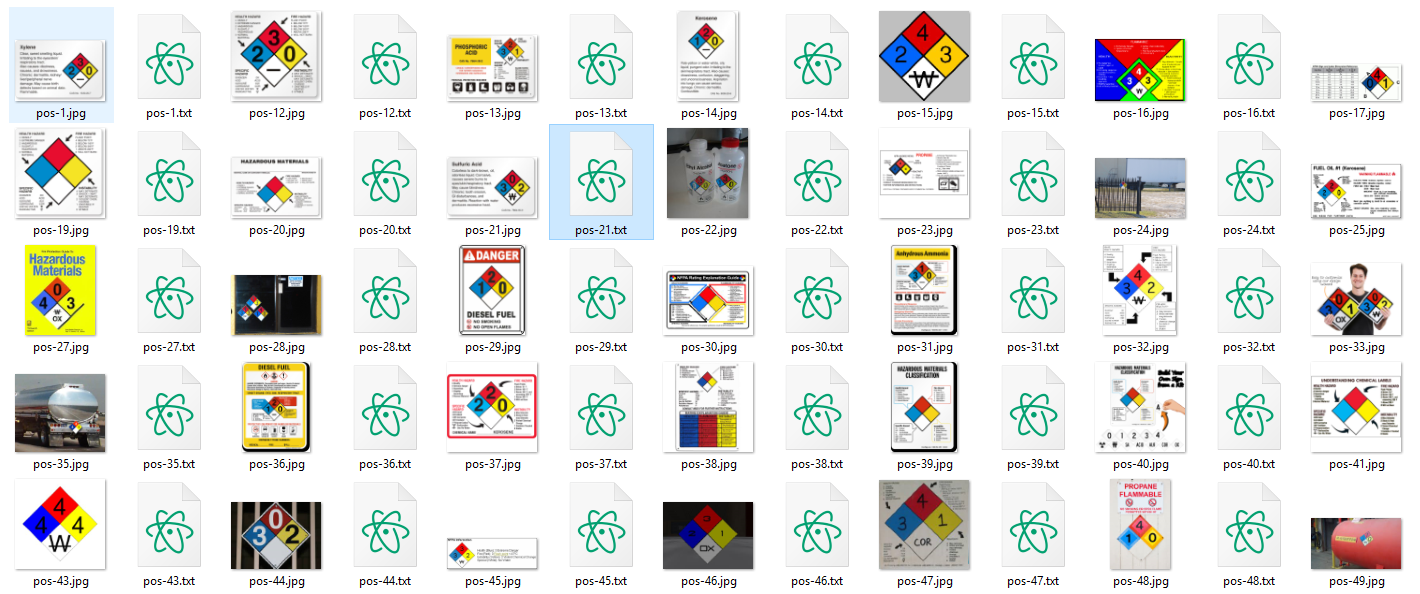
Now comes the hard and tedious work: labeling our entire training set. By clicking twice, we can create bounding boxes that should perfectly contain the object we want to detect. The above image illustrates this. Having multiple objects in the same image is no problem, just make sure you label them all correctly.
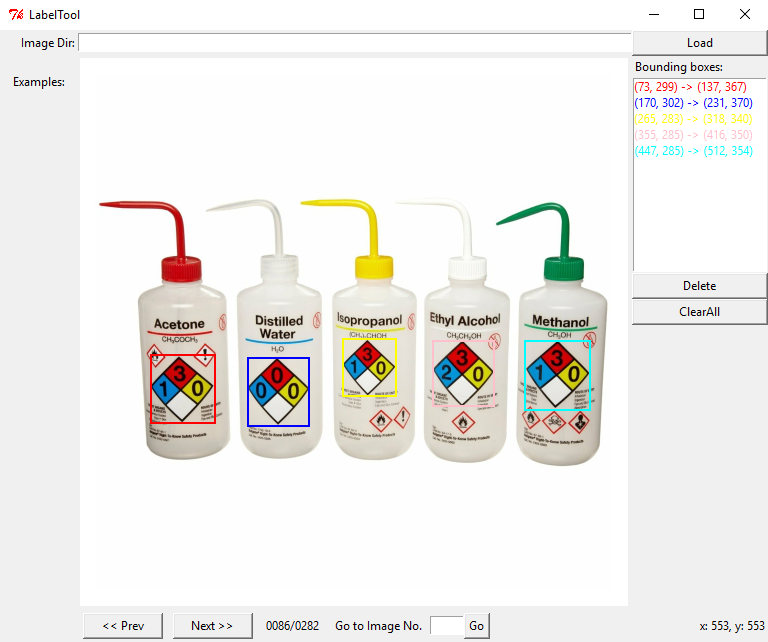
We will be repeating this step a lot of times, but remember that the quality of your object detection greatly depends on this step. If you go about it too carelessly and indicate the bounding boxes wrong a lot of times (too much margin around the object, cutting pieces off of the object), the detected bounding box will be of poor quality. Do bear in mind, if you want to be able to detect 'partial' objects (when a sign is half covered by something else for instance), you will have to include images in your set that represent this as well. In that case, cutting corners off of some images is a good idea.
Time to put on some good music and start labeling! Once you're done, the main.py script should have created the labels for your images in a folder Labels/000. If you are training multiple custom categories, every category will have its own folder.

We're doing great, but again the non-perfect world is right around the corner. The content of the .txt files is not to the liking of YOLOv2. The left image displays what a .txt label generated by BBox Label Tool contains, the image to the right contains the data as expected by YOLOv2. The difference being that YOLOv2 wants every dimension relative to the dimensions of the image.
BBox Label Tool:
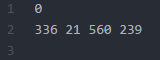 [category number]
[bounding box left X] [bounding box top Y] [bounding box right X] [bounding box bottom Y]
YOLOv2 format:
 [category number] [object center in X] [object center in Y] [object width in X] [object width in Y]
The conversion between these two formats can be handled by this Python script, written by Guanghan Ning. Just edit Line 34 and Line 35 to configure both in- and output path and we're good to go.
python .\convert.py
Great! We now have a .txt file per image in the training set, telling YOLOv2 where the object we want to detect is at: our data set is completely annotated. Make sure both file types are in the same folder. The below image illustrates how the folder should look like by now:
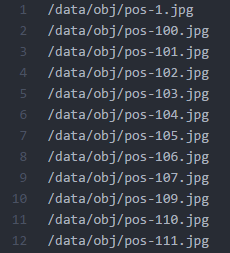
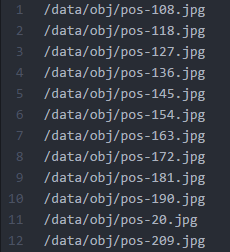
Ok, we're getting close to the point where our powerhouse GPU can start doing some serious number crunching. Next, we need to tell YOLOv2 what images form our actual training set, and what will serve as test set: the test.txt and train.txt files. I wrote a small process.py Python script that will create these files from the images found in the directory where it is run. The percentage of images to be used for test can be defined by changing the variable percentage_test. I don't have a GitHub repository up for my YOLOv2 experiments yet, so I'll just post the script here for now. The path_data variable indicates where images are located, relative to the darknet.exe executable, edit this as required.
import glob, os

# Current directory
current_dir = os.path.dirname(os.path.abspath(__file__))

# Directory where the data will reside, relative to 'darknet.exe'
path_data = 'data/obj/'

# Percentage of images to be used for the test set
percentage_test = 10;

# Create and/or truncate train.txt and test.txt
file_train = open('train.txt', 'w')
file_test = open('test.txt', 'w')

# Populate train.txt and test.txt
counter = 1
index_test = round(100 / percentage_test)
for pathAndFilename in glob.iglob(os.path.join(current_dir, "*.jpg")):
    title, ext = os.path.splitext(os.path.basename(pathAndFilename))

    if counter == index_test:
        counter = 1
        file_test.write(path_data + title + '.jpg' + "\n")
    else:
        file_train.write(path_data + title + '.jpg' + "\n")
        counter = counter + 1
Time to run this script!
python .\process.py
A small excerpt from the train.txt (left) and test.txt (right) files:
Preparing YOLOv2 configuration files
YOLOv2 needs certain specific files to know how and what to train. We'll be creating these three files:
- cfg/obj.data
- cfg/obj.names
- cfg/yolo-obj.cfg
First let's prepare the YOLOv2 .data and .names file. Let's start by creating obj.data and filling it with this content. This basically says that we are training one class, what the train and validation set files are and what file contains the names for the categories we want to detect.
classes= 1
train  = train.txt
valid  = test.txt
names = obj.names
backup = backup/
The obj.names looks like this, plain and simple. Every new category should be on a new line, its line number should match the category number in the .txt label files we created earlier.
NFPA
A final file we have to prepare (I know, powerful GPU eagerly waiting to start crunching!), is the .cfg file. I just duplicated the yolo-voc.cfg file, and made the following edits:
Line 3: set
batch=64, this means we will be using 64 images for every training stepLine 4: set
subdivisions=8, the batch will be divided by 8 to decrease GPU VRAM requirements. If you have a powerful GPU with loads of VRAM, this number can be decreased, or batch could be increased. The training step will throw a CUDA out of memory error so you can adjust accordingly.Line 244: set
classes=1, the number of categories we want to detectLine 237: set
filters=(classes + 5)*5in our casefilters=30
To start training, YOLOv2 requires a set of convolutional weights. To make things a little easier, Joseph offers a set that was pre-trained on Imagenet. This conv.23 file can be downloaded (76Mb) from the official YOLOv2 website and provides an excellent starting point. We'll need this file for the next step.
Training
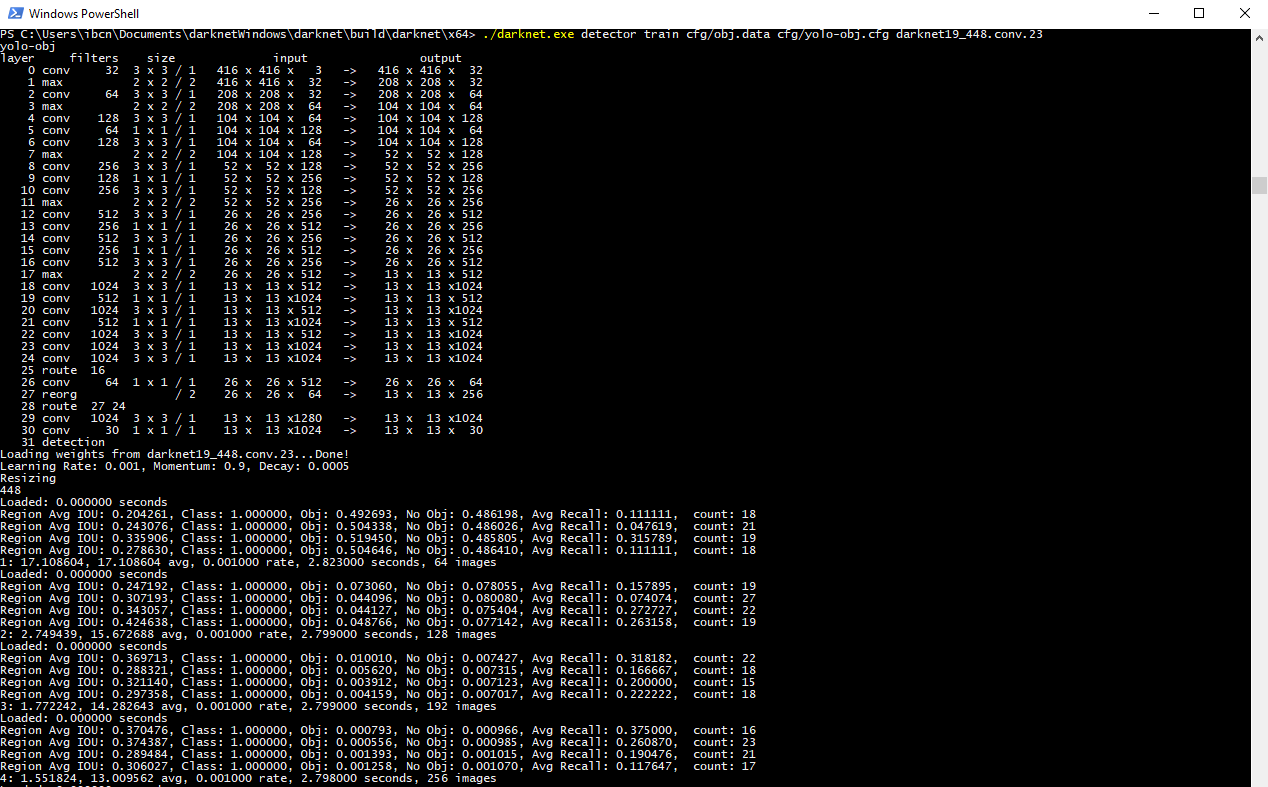
Time for the fun part! Enter the following command into your terminal and watch your GPU do what it does best:
darknet.exe detector train cfg/obj.data cfg/yolo-obj.cfg darknet19_448.conv.23
As you see, we put the yolo-obj.cfg and obj.data files in the cfg folder, to keep things organized. Your terminal should look something like this.
Note: since I am running this on an NVIDIA GTX1080 Ti, I have changed the subdivisions to 4, because .... I can? The GPU has 11GB GDDR5X of VRAM on board and can process big batches of images with ease. A really basic benchmark shows that the algorithm completes one training iteration in under 3 seconds when I have the subdivisions set to 4, as opposed to close to 3.5 seconds with the subidivision set to 8. Having the subdivision as low as your GPU allows will - judging from my very rudimental benchmark - reduce training time.
Edit: all of a sudden, I somehow got a CUDA out of memory error after 110 iterations. Weird ... I changed the subdivisions back to 8 to make sure the training is never interrupted.
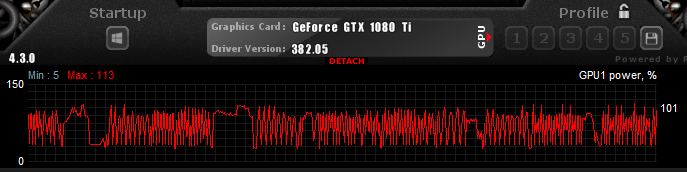
A screenshot from the MSI Afterburner tool, showing the GPU under load during training:
AlexeyAB has a very informative description explaining when you should stop training the model. The average loss (error) value (marked bold in the line below) that gets reported after every training iteration should be as low as possible.
2: 2.950644, 15.939886 avg, 0.001000 rate, 2.813000 seconds, 128 images
The YOLOv2 training algorithm is configured this way, that weights are being saved into the backup folder every 100, 200, 300, 400, 500 and eventually every multiple of 1000 iterations. If training ever were to be interrupted, willingly or accidentally, you can continue training from the last saved .weights file like so:
darknet.exe detector train cfg/obj.data cfg/yolo-obj.cfg yolo-obj_2000.weights
After about one hour of training, I reached 1000 iterations and the average loss (error) was found to be 0.082204. Pretty damn fast if you ask me, this is one mighty powerful GPU!

I will definitely train the model for a longer time to achieve an even higher accuracy, but for now will use the yolo-obj_1000.weights file in the results section to see how our model currently performs.
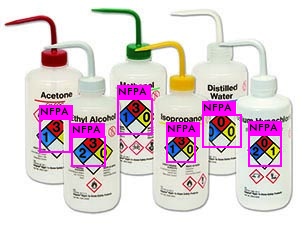
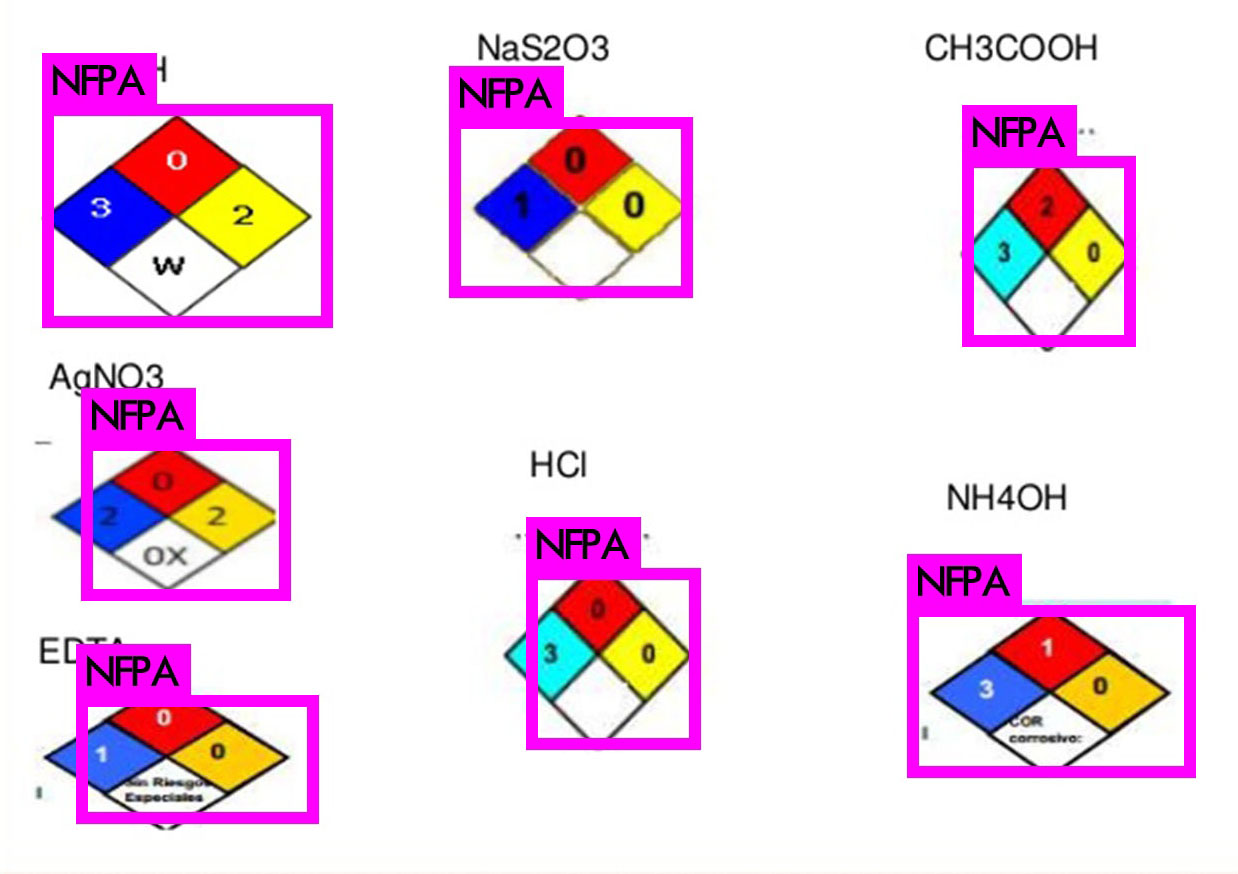
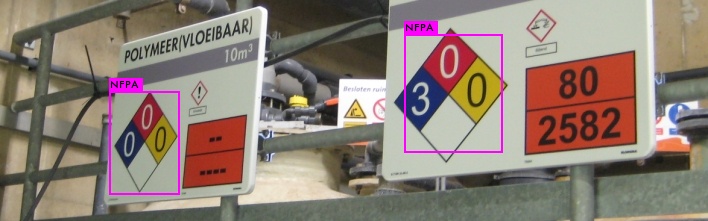
Results
We should now have a .weights file that represents our trained model. Let's use this on some images to see how well it can detect the NFPA 704 'fire diamond' pictogram. This command unleashes YOLOv2 on an image of our choosing:
darknet.exe detector test cfg/obj.data cfg/yolo-obj.cfg yolo-obj1000.weights data/testimage.jpg
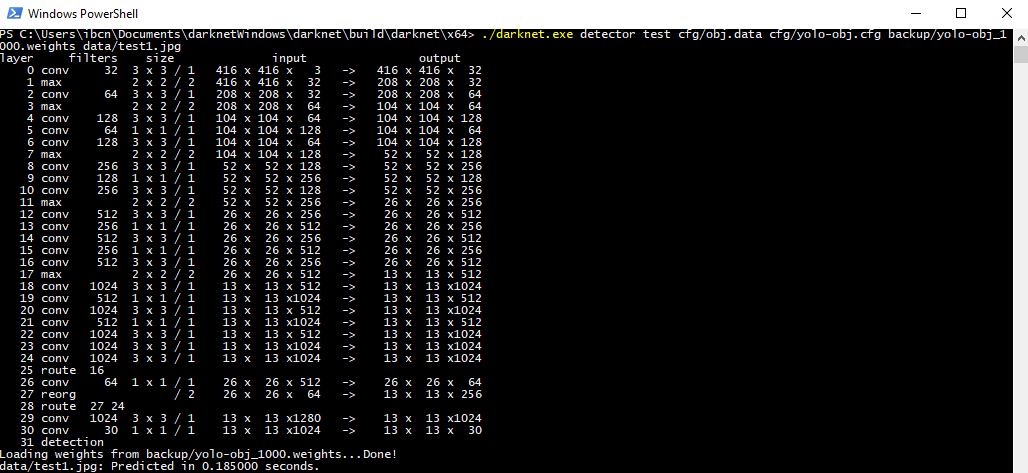
I picked some interesting images to showcase the performance of our detection setup. Images that haven't been used in training, we're not cheating here. As you can see, the results are very acceptable as every instance of the NFPA 'fire diamond' in the following images is correctly detected. Great succes!
Conclusion
In this article, we have extensively seen how we can train the very impressive YOLOv2 object detection algorithm to detect custom objects. Everything was tailored to one specific object, but it should be trivial to add more categories and retrain the model for them. The paper accompanying YOLOv2 proves the algorithm can handle over 9000 objects types, so you shouldn't run into a bottleneck any time soon.
There, that's it for today. I will continue to update this article as required, feel free to post any question you may have below. Have fun training!